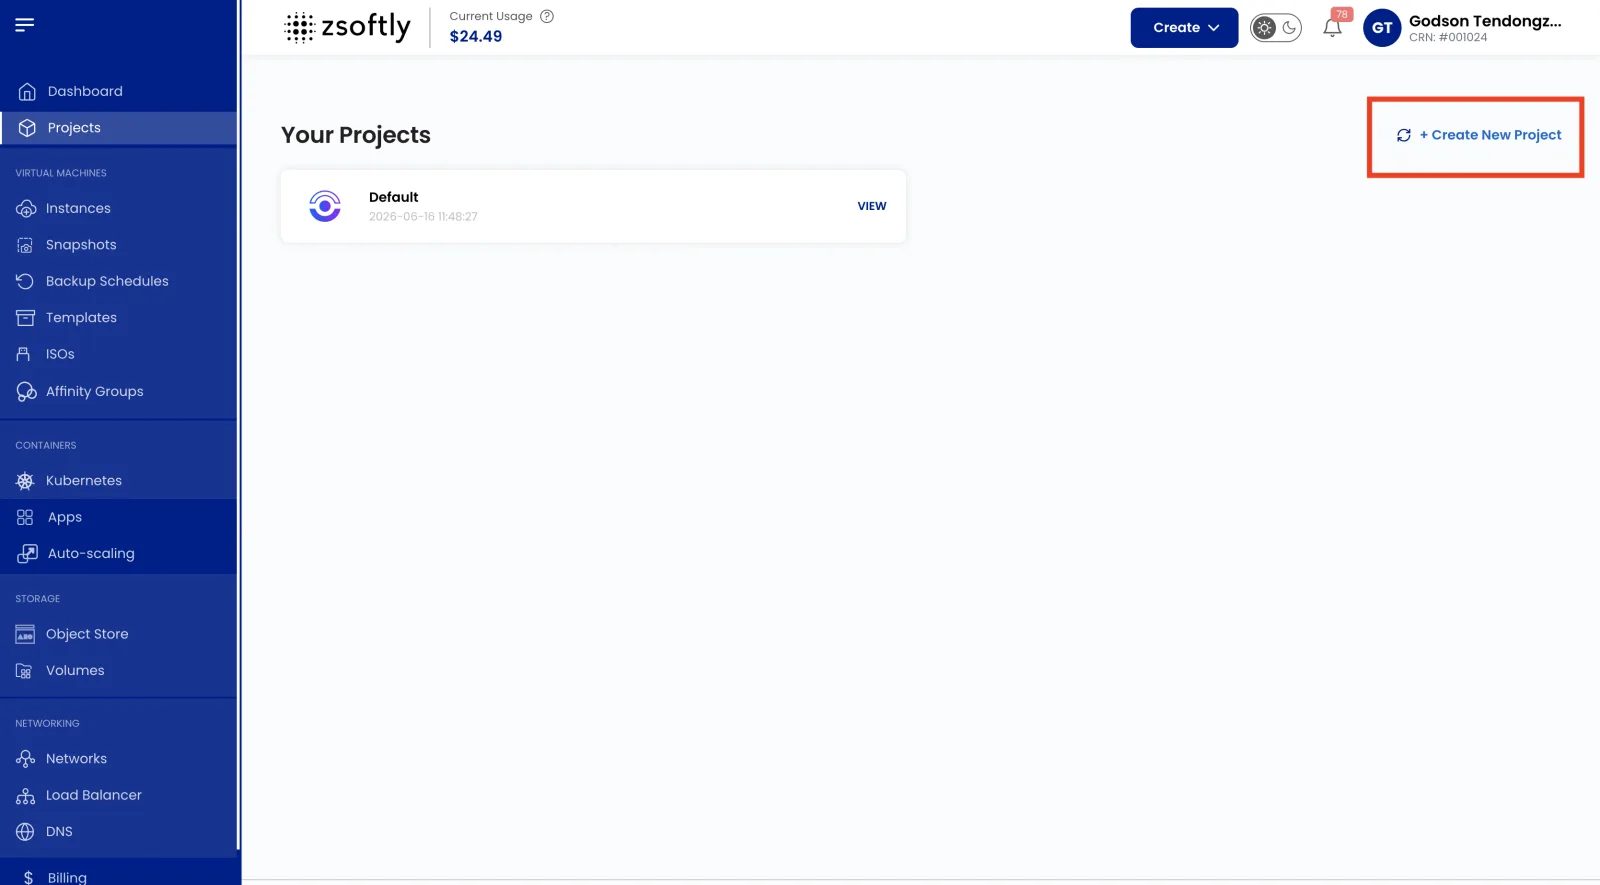
Projects
A Project is a workspace that groups related cloud resources (Compute Instances, networks, volumes, snapshots, load balancers, and more) under a single, shared boundary. Instead of resources living loosely under one account, a Project lets a team collaborate on a shared set of resources with its own membership and its own resource quotas.
Projects are a foundational concept: almost every resource you create (an instance, a network, a
block storage volume) is assigned to a Project. If you’ve ever been asked to “Choose the
Project” while creating a resource, that selector points here. Every account starts with a default
Project. Create additional Projects to separate environments (e.g. dev vs prd), teams, or
clients.
Why use Projects
Section titled “Why use Projects”- Collaboration: add teammates so everyone views and manages the same resources without sharing one login.
- Separation: keep workloads isolated. A
devProject and aprdProject hold completely separate instances, networks, and volumes. - Cost and quota control: set per-Project resource limits (account limits) so one team or environment does not consume more than its allocation.
- Organization: view resource lists, usage, and billing per Project to see what each team or environment is running.
Create a New Project
Section titled “Create a New Project”- From the left-hand menu, click Projects.
- Click Create a New Project.
- Enter the project details:
- Project Name: a short, recognizable name (e.g.
team-platform-prd). - Project Description: what the Project is for.
- Project Purpose: the intended use or owning team.
- Project Name: a short, recognizable name (e.g.
- Click Create Project. The Project is created and becomes available in the Project selector when you create resources.
Project Resources
Section titled “Project Resources”Once a Project is created, its overview shows the resources associated with it. From here you can see and manage everything the Project contains:
| Resource | Description |
|---|---|
| Compute Instance | Virtual servers for running applications or hosting websites. |
| VM Snapshot | Point-in-time capture of an instance’s state and data. |
| Backup | Managed backups that protect data and support business continuity. |
| Block Storage | Additional storage volumes attached to instances. |
| Network | Public and private (VPC) networking that connects and isolates resources. |
| Load Balancer | Distributes traffic across multiple instances for high availability. |
When you create any of these resources, you select the Project they belong to. See Create a Compute Instance for an example of the Project selector in action.
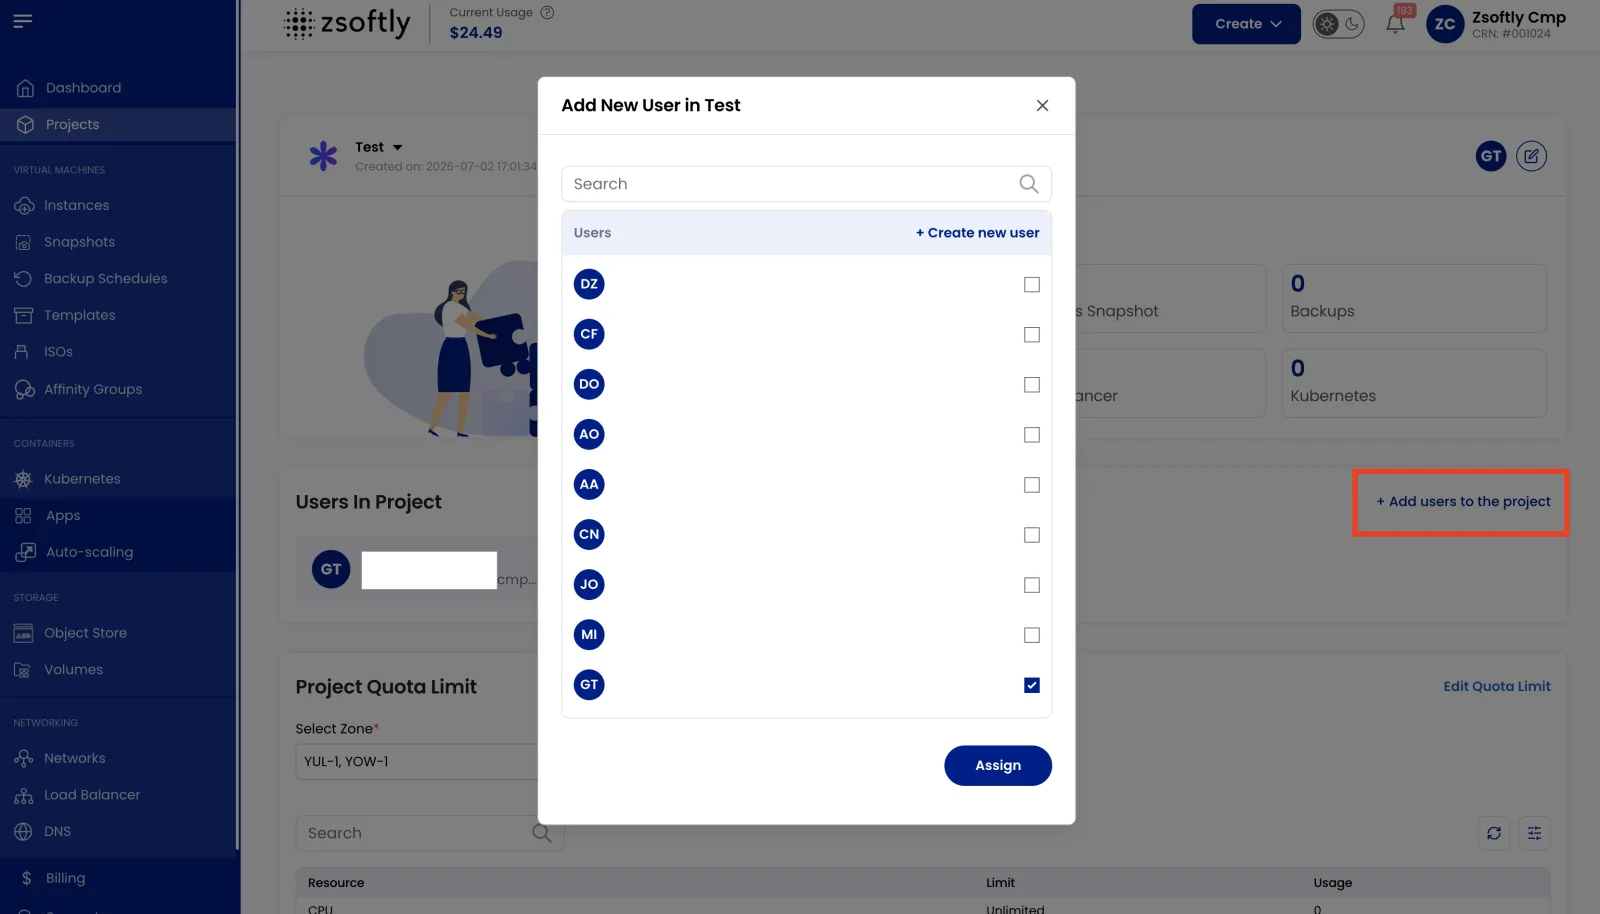
Add Users to a Project
Section titled “Add Users to a Project”Invite teammates so they can collaborate on the Project’s resources.
- Open the Project and click Add Users to the Project.
- Use the search bar to find the user you want to add.
- Click Add to include them in the Project.
The added user can now view and manage resources within this Project.
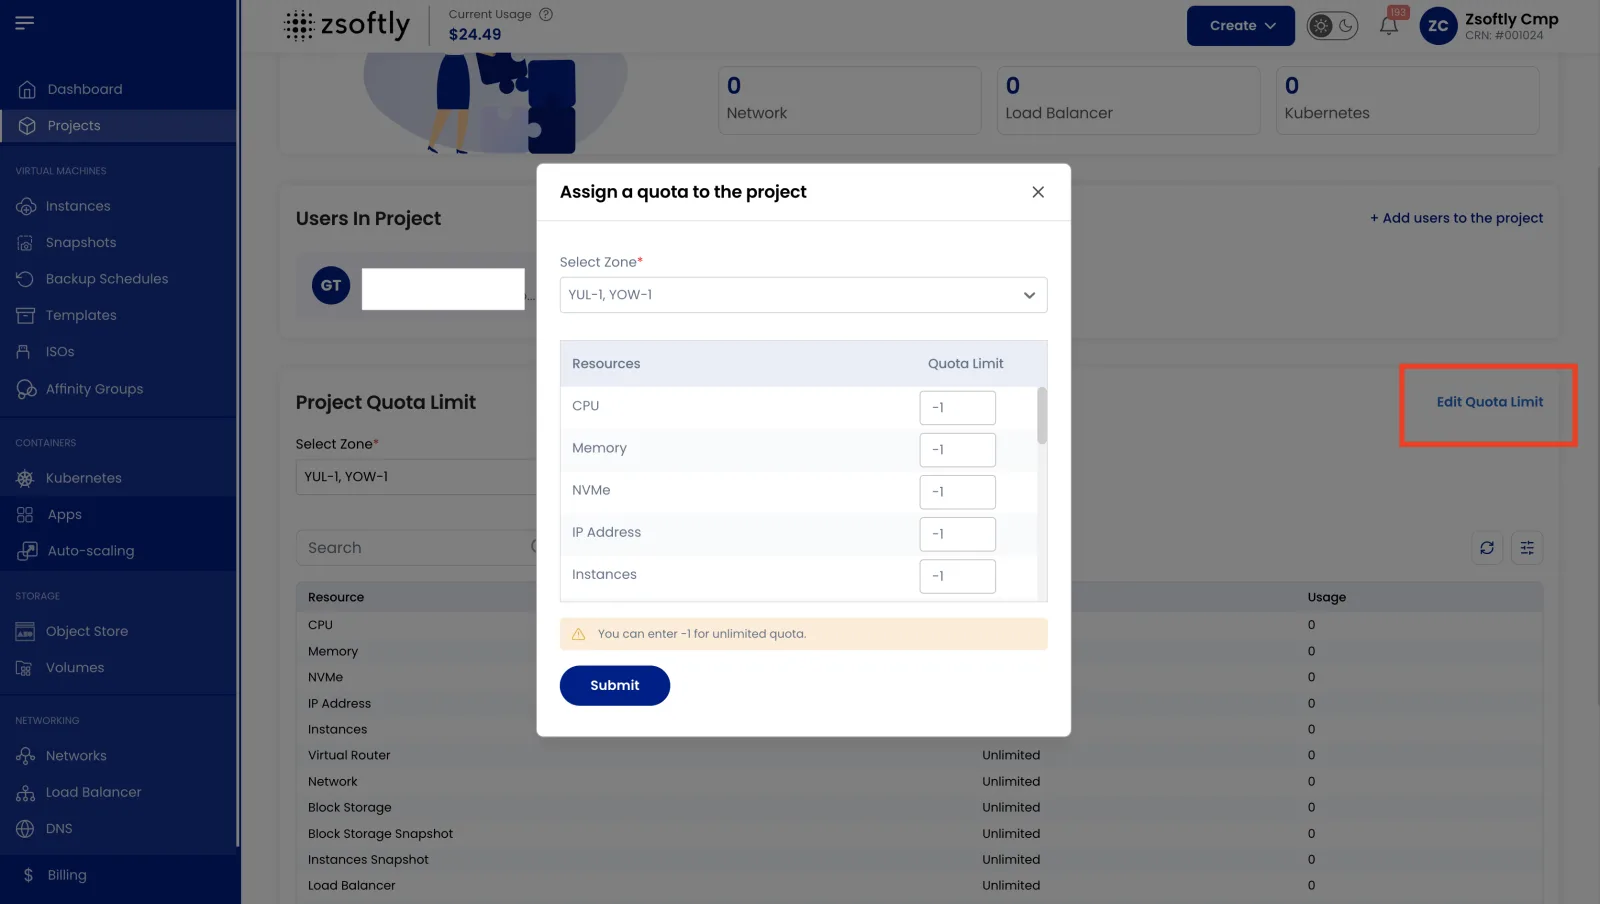
Set Account Limits and Quotas
Section titled “Set Account Limits and Quotas”Account limits cap how much of each resource a Project can consume, per Location. Use them to prevent runaway usage and to allocate capacity fairly across teams or environments.
- Open the Project and go to the Project Account Limit section. Here you can see the current limit and usage for each resource.
- Select the Location you want to set limits for.
- Click Edit Account Limit to open the Assign a Quota to the Project page.
- Choose the Location and the specific Resource whose quota you want to change.
- Enter the desired Quota Limit.
- Click Submit to apply the new limit.
Next steps
Section titled “Next steps”- Create a Compute Instance: deploy your first VM into a Project.
- Quickstart: go from zero to a running, reachable VM.
- Networking: give your Project’s resources connectivity.