Users
The Users section is where you add people to your organization and control their access. Each user signs in with their own credentials and is assigned a role that determines what they can do.
View users
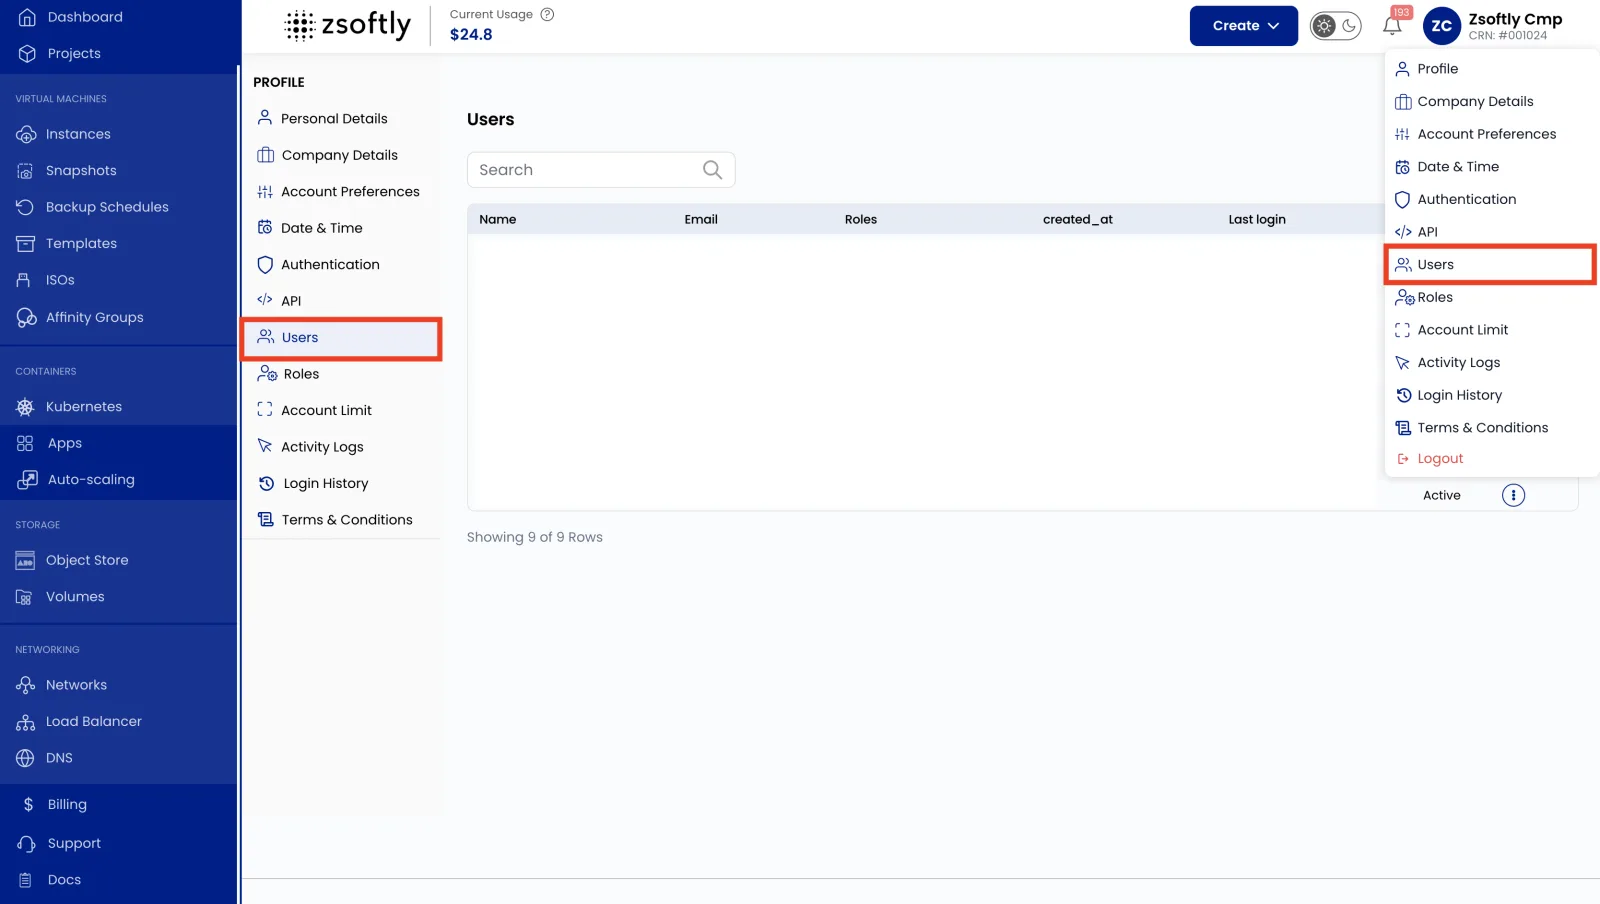
Section titled “View users”- Click your username (top-right) to open the Profile menu.
- Select Users to see the complete list of active and inactive users in your organization.
From the list, use the action buttons to edit a user’s details or role, or re-invite a user whose invitation is still pending.
Add a new user
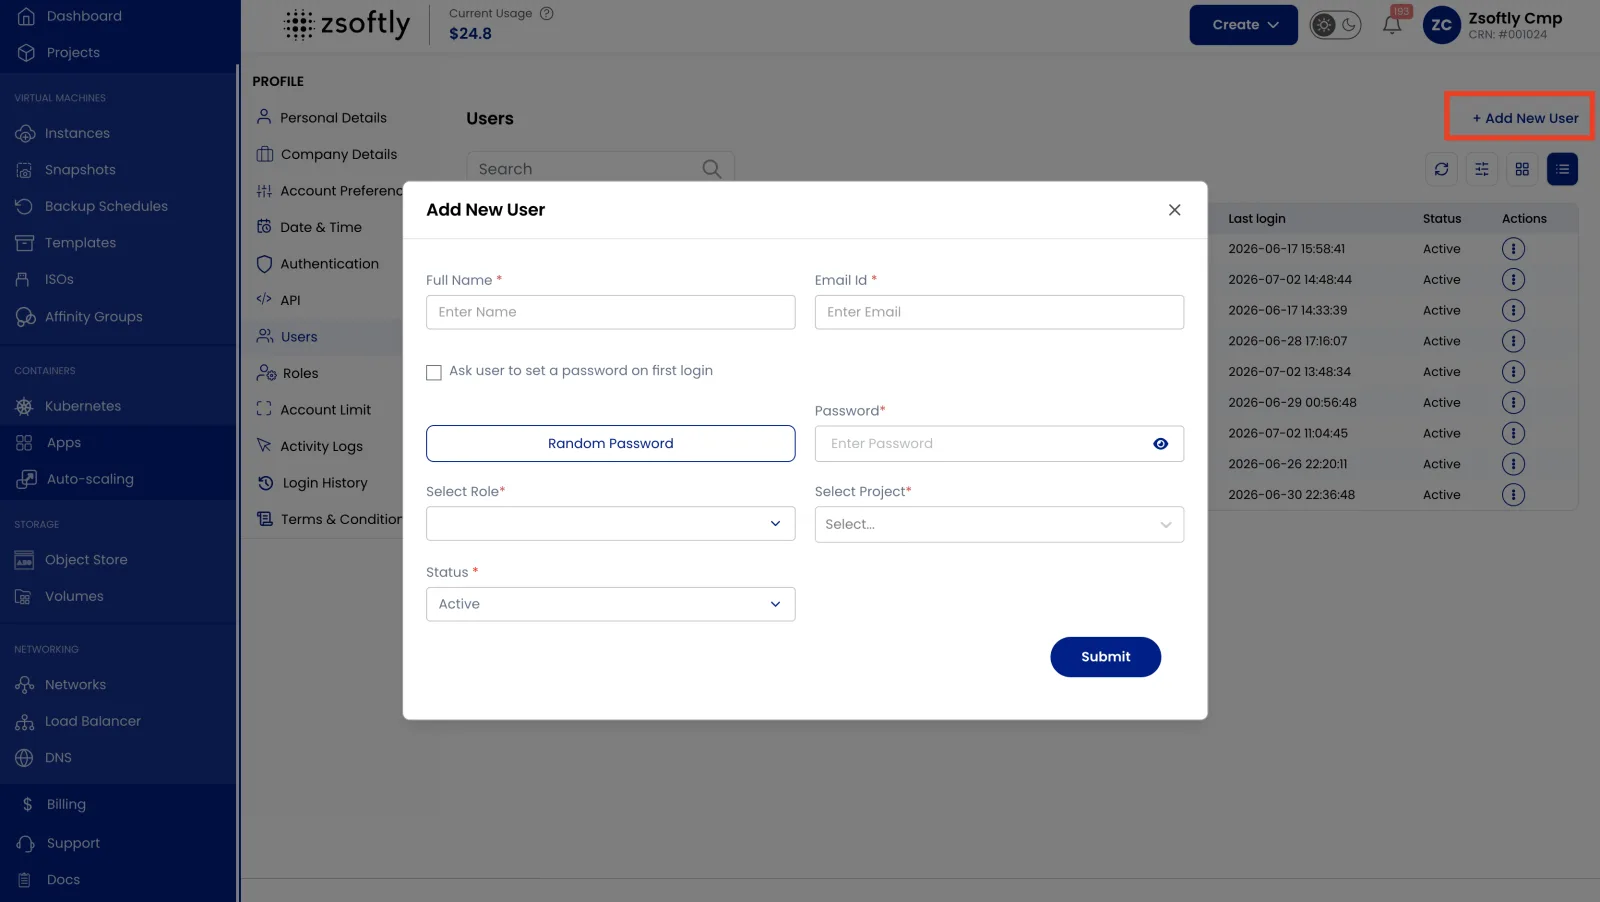
Section titled “Add a new user”- Click your username (top-right) to open the Profile menu.
- Select Users and click Add User.
- Enter the user’s details and select their Role (see Roles & Permissions to create one first if the role you need doesn’t exist yet).
- Click Submit to create the user.
The user receives an invitation and, once accepted, can sign in with the permissions granted by their role.
Restrict a user to specific Projects
Section titled “Restrict a user to specific Projects”You can limit a user to specific Projects so they only see and manage the resources in the Projects they’re authorized for. This combines with their role: the role controls what actions they can take, while the Project scope controls which resources those actions apply to.
Manage sub-users from the CLI
Section titled “Manage sub-users from the CLI”The same actions are available in the ZCP CLI. Sub-user commands
are account-level (no --region/--project), and a sub-user can be referenced by either its ID
or its email.
# List sub-users (optionally filter by role or blocked state)zcp sub-user listzcp sub-user list --role service-administratorzcp sub-user list --blocked
# Create a sub-user. --email must be a company address; --password needs 8+ chars# with mixed case, a number, and a symbol; --role is a role slug (see `zcp role list`);# --project is repeatable. New sub-users start blocked until you unblock them.zcp sub-user create --name "Jane Doe" --email jane@yourco.com \  --password 'S3cret!pass' --role service-viewer --project default-9
# Change a sub-user's role or projects (referenced by email or ID)zcp sub-user update jane@yourco.com --role service-administrator
# Revoke or restore access without deleting the accountzcp sub-user block jane@yourco.comzcp sub-user unblock jane@yourco.com
# Remove a sub-user entirelyzcp sub-user delete jane@yourco.com
Related
Section titled “Related”- Roles & Permissions: define what a user is allowed to do.
- IAM Overview: how the RBAC model fits together.