Create Kubernetes Cluster
Managed Kubernetes on ZSoftly Public Cloud gives you a standard, upstream Kubernetes cluster without
operating the control plane yourself. Provision it from the portal, scale on demand, and connect
with the kubectl and Helm workflows your team already uses. No forked distributions and no
proprietary operators, so what you build here runs anywhere.
Supported versions
Section titled “Supported versions”ZCP supports Kubernetes 1.34, 1.35, 1.36, and 1.37. New clusters can choose 1.37.0, 1.36.4 (the default), 1.35.8, or 1.34.11. A cluster created on an earlier patch release, such as 1.36.1, 1.35.1, or 1.34.3, currently stays on that version until you upgrade it. A future ZCP lifecycle notice may require an upgrade.
Upgrade a running cluster one minor version at a time, or apply a patch within the same minor
version. Do this in place from the Cluster Overview.
Match your kubectl client to the cluster’s minor version. See
kubectl Access.
| Item | Support |
|---|---|
| Kubernetes | 1.34, 1.35, 1.36, 1.37 (default for new clusters: 1.36.4) |
| Distribution | Standard upstream Kubernetes, no forks |
| Upgrades | In-place, one minor version at a time, or a patch within the same minor |
Version Lifecycle
Section titled “Version Lifecycle”The Kubernetes project supports recent minor releases for a limited period. In the final maintenance phase, it provides critical core-component, dependency, and security fixes. After end of life, upstream provides no further fixes for that minor line. ZCP availability does not extend that maintenance period. See the Kubernetes patch release schedule.
| Minor | Maintenance Mode Starts | Upstream End of Life |
|---|---|---|
| 1.37 | August 28, 2027 | October 28, 2027 |
| 1.36 | April 28, 2027 | June 28, 2027 |
| 1.35 | December 28, 2026 | February 28, 2027 |
| 1.34 | August 27, 2026 | October 27, 2026 |
Kubernetes 1.33 reached end of life on June 28, 2026, and 1.32 on February 28, 2026. See the Kubernetes release history for older minor lines.
ZCP plans to retain three recent supported minor lines. The proposed December 2026 transition would retire 1.34 from the standard offering and set 1.35 as the minimum supported version. The rolling minimum advances as newer ZCP minor lines are adopted and announced.
Upgrade before Kubernetes 1.34 reaches end of life on October 27, 2026. Do not wait for the proposed transition.
If the proposal takes effect, clusters below the minimum would need an upgrade or a separately agreed paid enhanced-support arrangement. Without such an agreement, ZCP plans automatic upgrades after an announced cutoff. The cutoff, scope, eligibility, pricing, notice period, and service terms have not been announced. An enhanced-support arrangement does not by itself guarantee security backports.
What you get
Section titled “What you get”- Managed control plane: ZSoftly runs and maintains the control plane. You focus on workloads.
- High availability (optional): add control nodes for a redundant control plane.
- Autoscaling: set a minimum and maximum worker-node count and the cluster scales to demand.
- Node plans: choose a fixed plan (set CPU, memory, and storage) or a custom plan (your own sizing and node count).
- Persistent volumes: dynamically provisioned block storage through the cluster’s CSI driver.
- Load balancers: expose a
Serviceof typeLoadBalancerand reach it on a public address. - Standard tooling: works with
kubectl, Helm, and the Kubernetes dashboard. Download akubeconfigfrom the portal. - In-place version upgrades and optional SSH access to the nodes.
Create a cluster
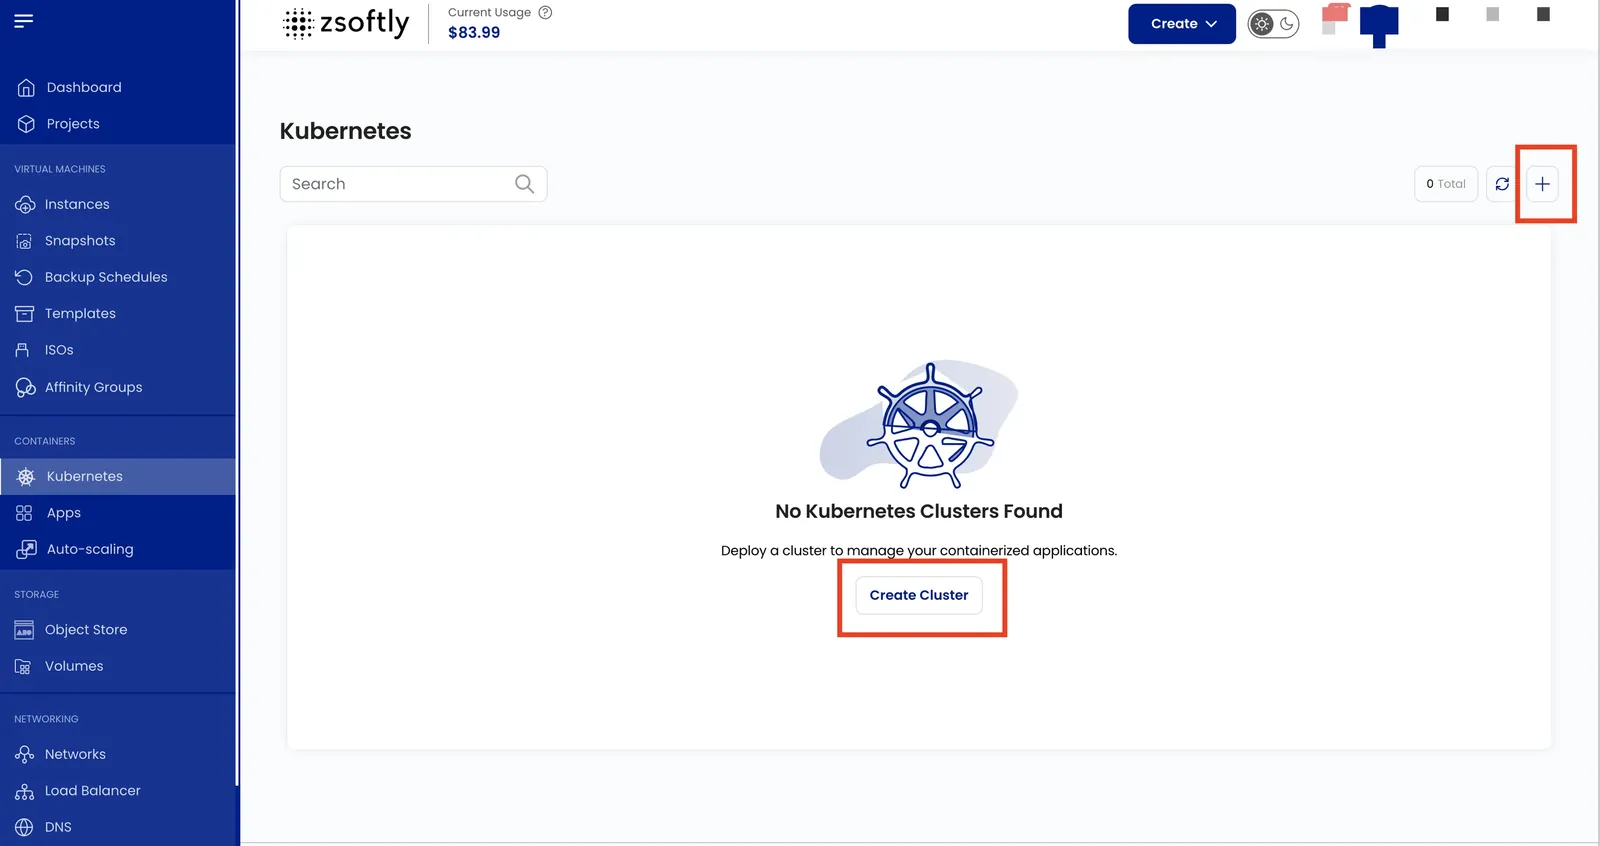
Section titled “Create a cluster”- From the left-hand menu, click Kubernetes.
- Click Create Cluster or the + icon.
- Project: assign to a project.
- Location: select the data center.
- Select Version: choose the Kubernetes version for the cluster.
- Storage Type: select the storage type for the cluster nodes.
- Cluster Capacity:
- Select a predefined Node Plan (fixed CPU/memory/storage)
- Or use a Custom Plan (specify CPU, memory, storage, and node count)
- Advanced Settings (optional):
- Enable High Availability for redundancy
- Add Control Nodes for additional stability
- Add an SSH Key for node access
- Cluster Name: provide a unique name.
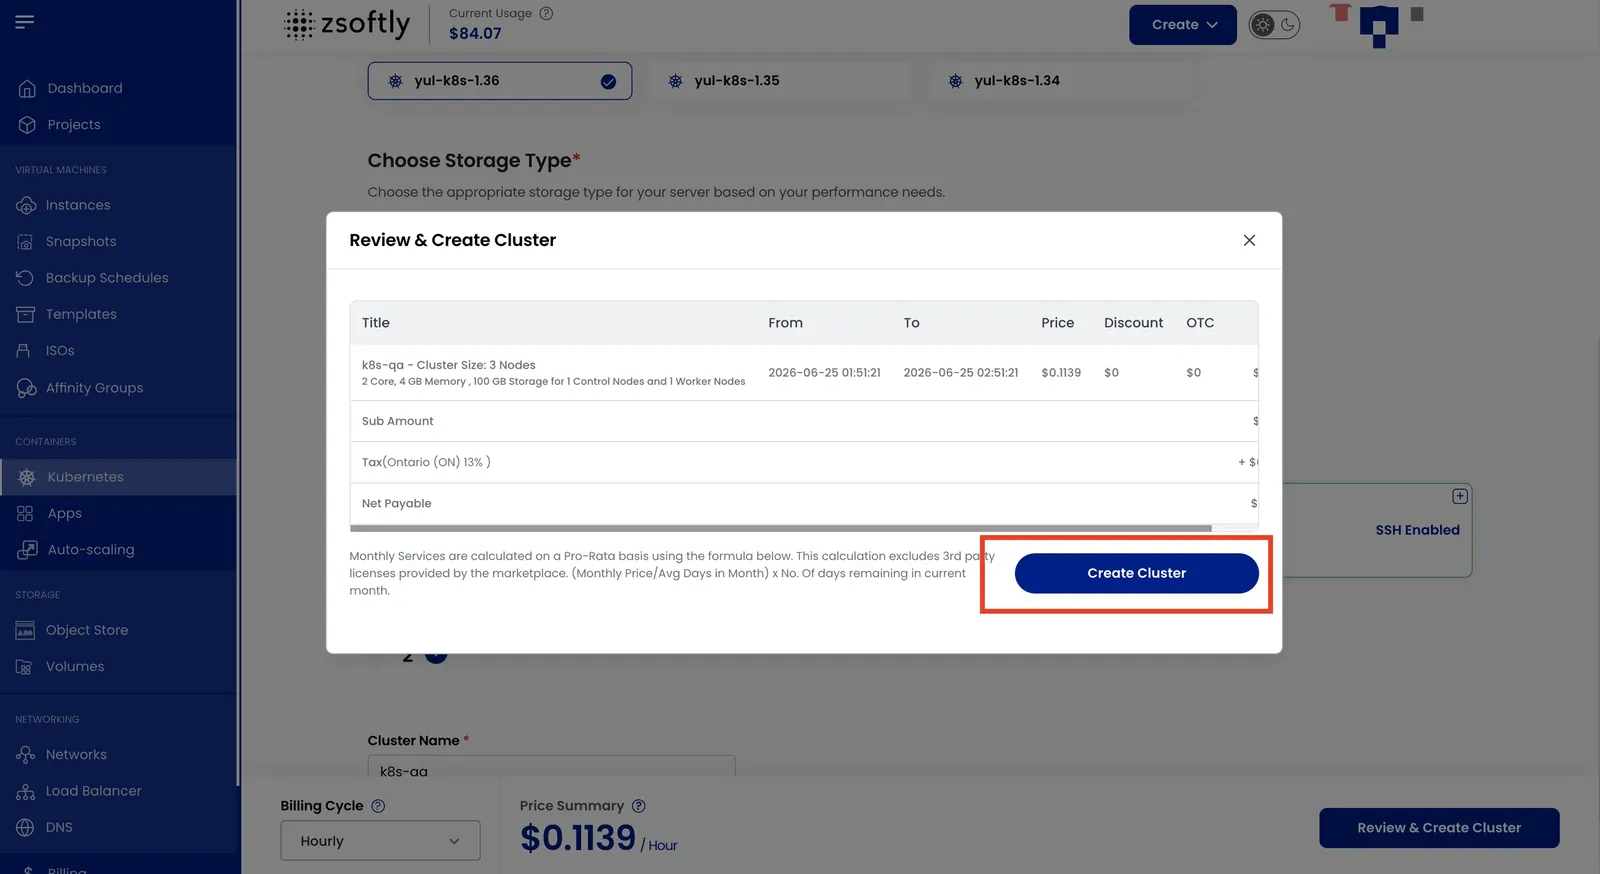
- Create:
- Billing cycles: Hourly, Monthly, or Yearly.
- Click Create Cluster
After you create
Section titled “After you create”- Connect with kubectl: download your
kubeconfigand run your first commands. - Cluster Overview: scale, upgrade, and manage the cluster.
- Dashboard Access: use the web dashboard.