Create Bucket
Object Storage
Section titled “Object Storage”ZSoftly Public Cloud object storage is S3-compatible. Use it for files, backups, static assets, or any unstructured data.
Create an Object Storage Instance
Section titled “Create an Object Storage Instance”- From the left-hand menu, click Object Storage.
- Click Create Object Storage or the + icon.
- Assign to a Project.
- Choose a Location.
- Object Storage Size: choose storage type and size. Custom plans available.
- Name: provide a unique name.
- Create: Billing cycles: Hourly, Monthly, Quarterly, Semiannually, Yearly, Bi-annually, Tri-annually. Billing rules: Date to Date, Fixed Calendar Month, Unfixed Calendar Month, Fixed Prorata, Unfixed Prorata. Click Review and Create.

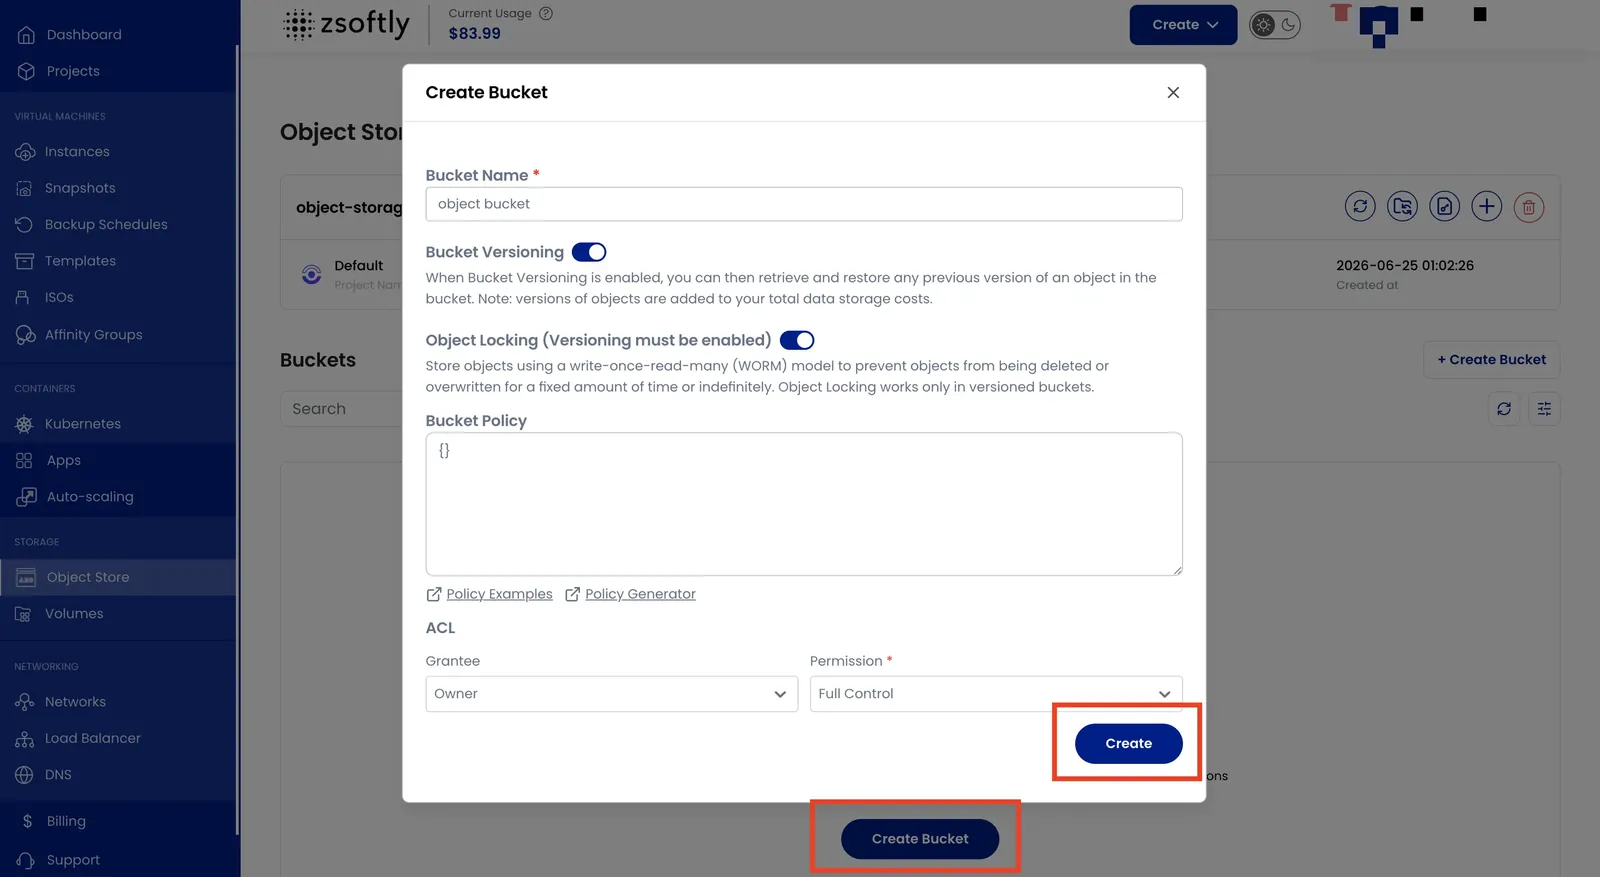
Create a Bucket
Section titled “Create a Bucket”Once your object storage instance is active:
- Click Create Bucket.
- Enter a Bucket Name.
- Optionally enable Bucket Versioning (required for Object Locking).
- Optionally enable Object Locking: stores objects in a write-once-read-many (WORM) model.
- Click Create.
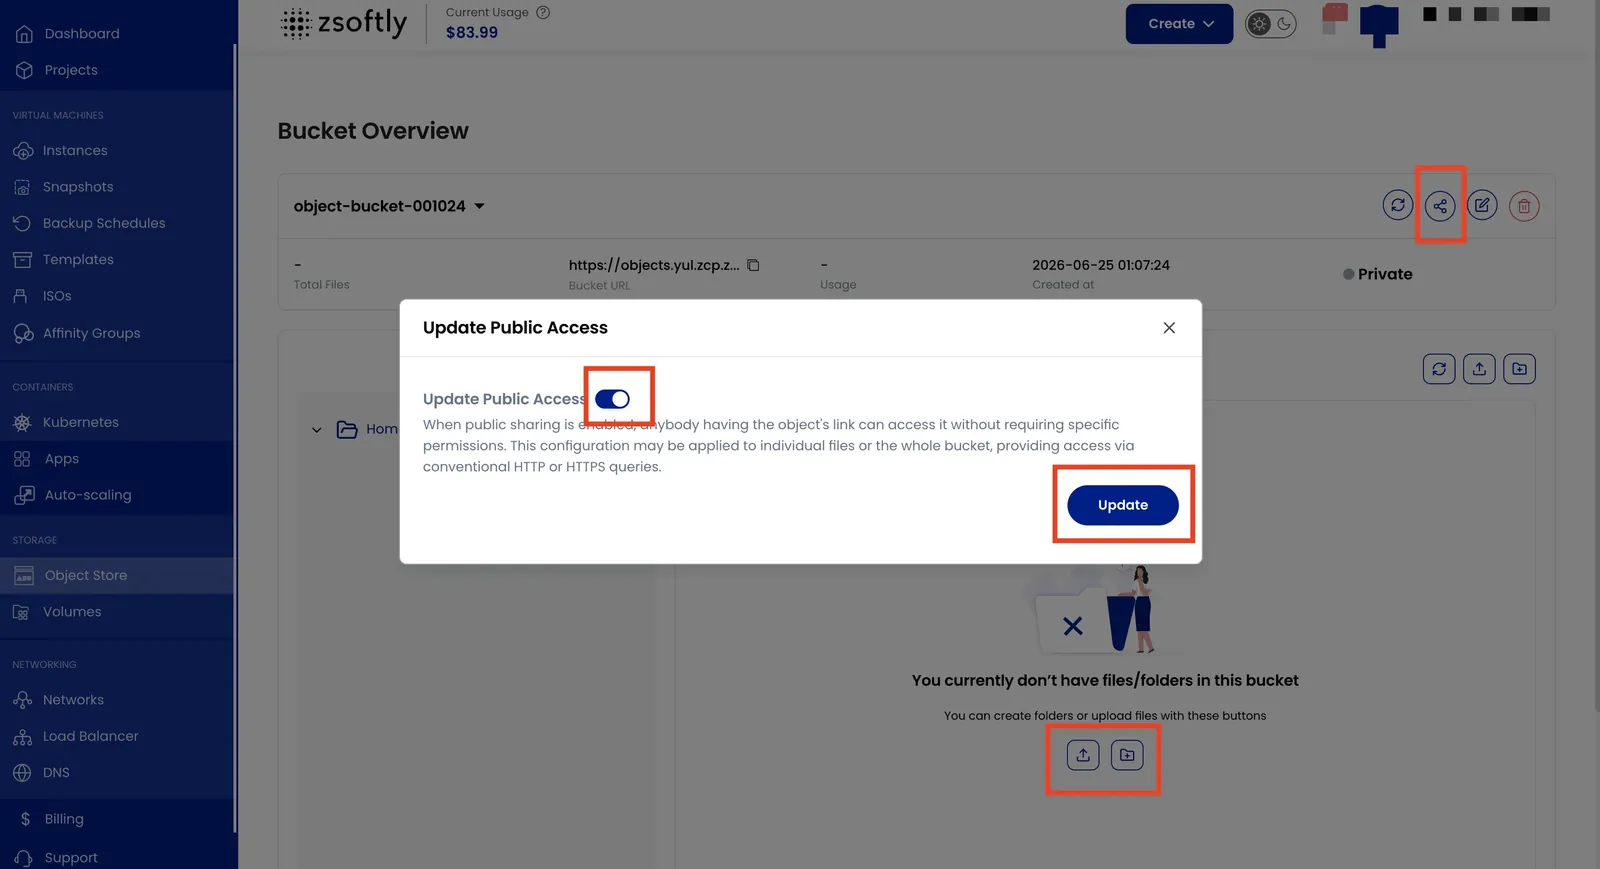
Manage Buckets
Section titled “Manage Buckets”- Share: Enable public sharing so anyone with the object URL can access it.
- Upload Files: Upload files directly through the portal.
- Create Folder: Organize objects into folders within the bucket.
Auto Scaling
Section titled “Auto Scaling”Toggle auto-scaling on/off from the storage instance actions to automatically resize based on usage.
Credentials
Section titled “Credentials”Click the Credentials icon to view your S3 Access Key and Secret Key for programmatic access.
See also: Access Keys, S3 Usage