Build a Private Network with Headscale on ZCP
Ce contenu n’est pas encore disponible dans votre langue.
This tutorial builds a private network on ZCP: a VPC with a network tier that has no public exposure by default, plus a self-hosted Headscale server that gives you WireGuard-based mesh access into it. It’s the foundation for the rest of this series: private storage and private employee desktops both live inside the tier you build here, reachable only through the mesh, never over a public IP.
By the end you have:
- A private VPC and network tier
- A custom network ACL locking that tier down to only the traffic it needs
- A self-hosted Headscale server, deployed from the Marketplace
- A subnet router bridging the public internet and the private tier
- Your own device connected to the mesh, reaching into the private tier
Plan for about 30 minutes.
Before you start
Section titled “Before you start”- A ZSoftly Public Cloud account. Sign up first if you do not have one.
- A terminal with an SSH client.
jqinstalled. The build and teardown scripts in this tutorial require it (apt install jqorbrew install jq).- The Tailscale client installed on your own machine, to prove connectivity at the end.
Step 1: Install the CLI
Section titled “Step 1: Install the CLI”# macOS and Linuxcurl -fsSL https://raw.githubusercontent.com/zsoftly/zcp-cli/main/scripts/install.sh | bash# Windows (PowerShell)irm https://raw.githubusercontent.com/zsoftly/zcp-cli/main/scripts/install.ps1 | iexConfirm it works with zcp version.
Step 2: Authenticate
Section titled “Step 2: Authenticate”- In the portal, open Profile → API Tokens and create a token. Copy it.
- Create a CLI profile and answer its prompts:
zcp profile add defaultIt prompts for the Bearer token you copied, then a default region and default project
(see the note below to look those up first if you don’t already know them). There’s no API URL
prompt. That’s a fixed default unless you override it with --api-url-override. Then verify:
zcp auth validateStep 3: Find your resources
Section titled “Step 3: Find your resources”Find the Headplane template (it bundles the Headscale control server and a web UI):
zcp template list | grep -i headplane
Note the SLUG (for example zmi-headplane-070-ubuntu2404-100-1). Template slugs vary by region
and version.
You also need a compute plan, a network plan, a VPC router plan, and a storage category:
zcp plan vm # compute plans, e.g. ca2smzcp plan network # network plans, e.g. pnet-yulzcp plan router # VPC router plan, e.g. virtual-private-cloud-vpc-1zcp storage-category list # e.g. pro-nvme, ssd-storage, premium-ssdStep 4: Add your SSH key
Section titled “Step 4: Add your SSH key”ssh-keygen -t ed25519 -C "you@example.com" # skip if you already have one
zcp ssh-key import --name my-key --key-file ~/.ssh/id_ed25519.pub
zcp ssh-key listRun the script
Section titled “Run the script”Building the VPC, private tier, ACL, Headplane, and subnet router is one script:
zcp/build-private-network.sh from the zsoftly/tools
repository. It runs through the same phases explained in the next section, in order, and prints each
resource as it creates it.
bash <(curl -fsSL https://raw.githubusercontent.com/zsoftly/tools/main/zcp/build-private-network.sh) \ --ssh-key my-key --name my-workspaceThis tutorial uses my-workspace as the --name prefix throughout its command examples. The
screenshots below are from an earlier test run with a different prefix, so the resource names you
see in them won’t match the command examples exactly. Your own resource names will differ from both,
based on whatever --name you choose.
The script picks up ZCP_REGION and ZCP_PROJECT from your shell if you exported them in Step 2.
Pass --region/--project instead if you didn’t.
| Flag | Purpose | Default / requirement |
|---|---|---|
--ssh-key | Key name from Step 4, used for both VMs | Required |
--name | Prefix for every resource name it creates | workspace |
--region | zcp region slug | Required (flag or env var) |
--project | zcp project slug | Required (flag or env var) |
-y/--yes | Skip the confirmation prompt below | Off |
The Headplane template, both compute plans, the network plan, the VPC router plan, and both storage categories are auto-discovered from your account. The script prints what it picked at the top of its own output, so you can see the choice before anything is created.
The subnet router template isn’t looked up. It defaults to a fixed slug (ubuntu-2404-lts-1). Pass
--router-template if your account doesn’t have that template. Your public IP (--my-ip), the VPC
network base (--network-address), and the billing cycle (--billing-cycle) aren’t account lookups
either. They default to an auto-detected or fixed value that you can override.
Pass any flag explicitly to pin a specific value instead. Run the script with --help for the full
list.
==> Preflight checks[OK] zcp CLI authenticated, region=yul-1 project=default-9[INFO] Detecting your public IP...[INFO] Admin-port access scoped to: <your-ip>/32[INFO] Resolved resources:    Headplane template   : zmi-headplane-070-ubuntu2404-100-1    Headplane plan       : ci2ls    Router template      : ubuntu-2404-lts-1    Router plan          : ci2ls    Network plan         : pnet-yul    VPC router plan      : virtual-private-cloud-vpc-1    VPC storage category : pro-nvme    VM storage category  : pro-nvme
This creates a VPC, two VMs (plans above), and networking on your account now.Billing starts as soon as each resource is created.Type 'yes' to continue:
Unless you passed -y/--yes, the script stops here and waits for you to type yes. Everything
above this point is read-only lookups, nothing has been created yet.
The script then takes several minutes. It waits for both VMs to boot, waits for Headplane’s first-boot provisioning to finish, and waits for SSH before configuring anything over it.
What the script builds
Section titled “What the script builds”VPC and private tier
Section titled “VPC and private tier”The private tier itself has no public IP. Only Headplane gets an internet-facing application port.
The script creates a VPC (my-workspace) and a network tier inside it (my-workspace-tier), with
no public IP on the tier itself. Both VMs the script deploys get their own public IP, and the script
needs it to configure each one over SSH regardless. Beyond that, each VM needs it for a different
reason. Headplane needs it because it is the Headscale server: the router and your own device both
reach it over that address. The router needs it too, but only during setup, to reach Headplane
before it enrolls in the mesh. Headplane is the only one of the two with an internet-facing
application port, opened deliberately through firewall and port-forward rules.
The custom network ACL
Section titled “The custom network ACL”The ACL makes the tier private, not the VPC by itself.
The tier’s default ACL permits everything. The script replaces it with one that only allows what the tier needs, then applies that ACL to the tier. A VPC alone doesn’t guarantee isolation. The ACL does.
Verify the rules landed (see zcp acl rules under Inspect what was created, below):

Headplane
Section titled “Headplane”Headplane opens exactly one application port to the internet, deliberately: the mesh control endpoint. The admin UI never touches the public internet at all.
The script deploys the Headplane marketplace template (it bundles the Headscale control server and a web UI) on its own public network.
By default, the template’s first-boot script points the Headscale configuration at the VM’s private IP. External devices need the public IP instead, so the script SSHes in, rewrites that config, and restarts the stack.
The script opens port 8080 (Headscale’s mesh control endpoint) on the firewall and creates the
matching port-forward rule. A firewall rule alone permits traffic at the network level. On this kind
of network it does not get you reachability by itself. A port-forward rule maps the public IP’s port
to the VM’s private IP. Both are required. 8080 has to stay open broadly (0.0.0.0/0): any remote
device that will ever join the mesh needs to reach it from wherever it is, by design.
First boot on the Headplane VM generates a unique cookie secret, starts the stack, creates a default
Headscale user, and mints an API key, written to /etc/headplane/credentials.txt on the VM. The
script reads it over SSH and prints it in its final summary. That’s a one-time read by convention,
not a technical limit: if you need the key again later, SSH in and read
/etc/headplane/credentials.txt directly.
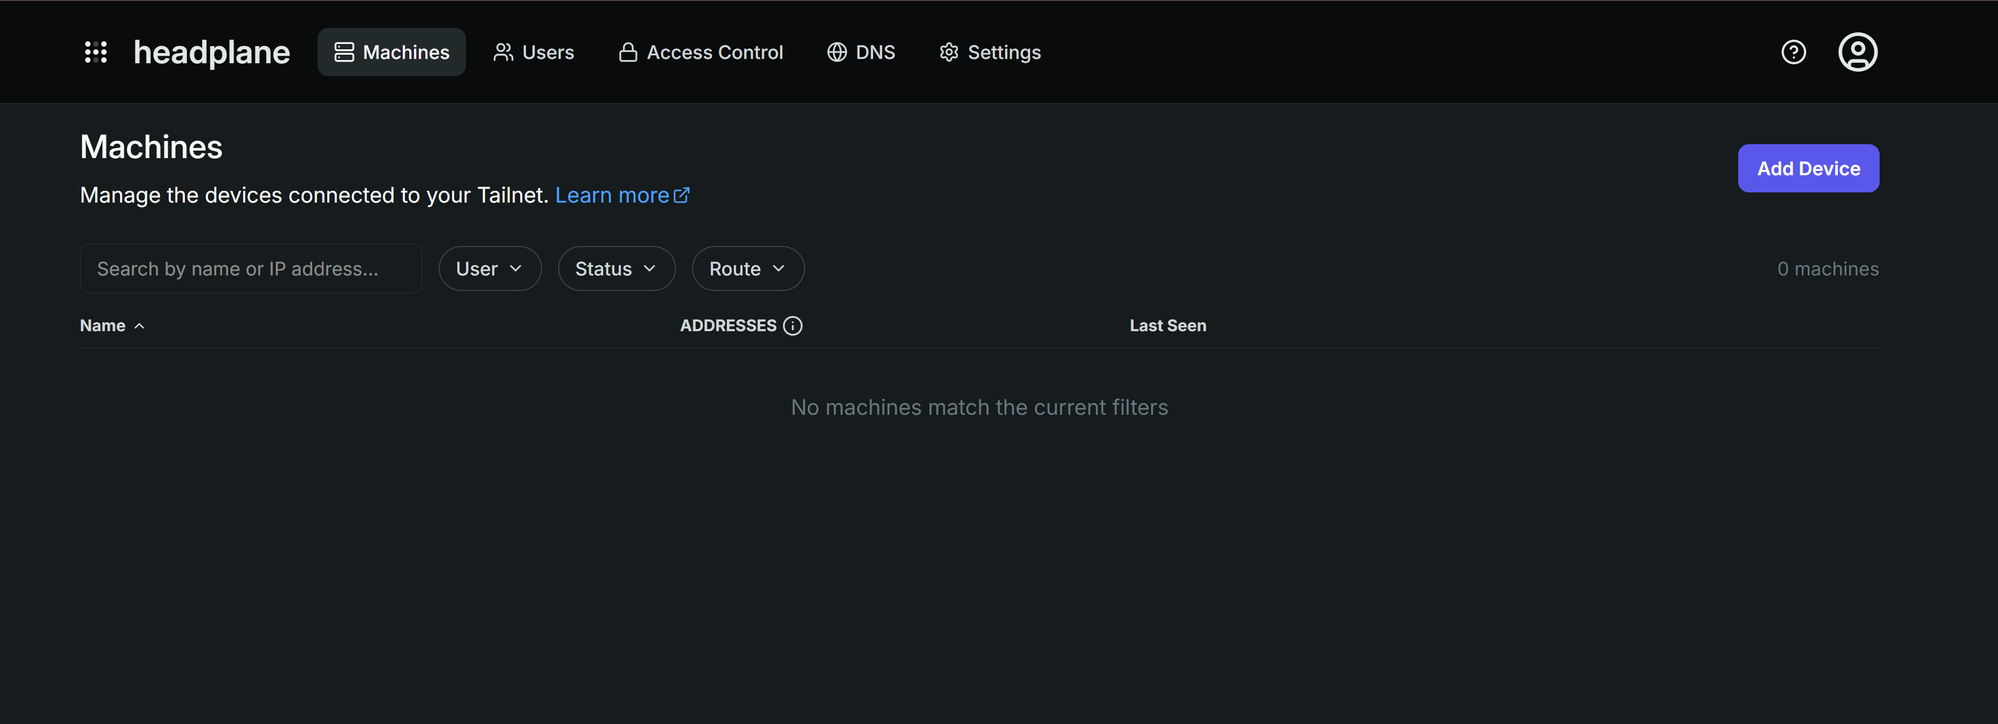
With the tunnel open, sign in at http://localhost:3000/admin/login with the API key.
The subnet router
Section titled “The subnet router”The subnet router is the only path between the internet and the private tier.
The script deploys a small VM with two network interfaces: its own public network, to reach Headscale for registration, plus the private tier, attached after creation.
The platform hot-adds the second network interface, but the operating system doesn’t bring it up automatically. The script writes a netplan file for the new interface and applies it, then reads back the address the tier’s DHCP assigned.
It installs the Tailscale client on the router (the same client Headscale uses, pointed at a custom
control server) and enables IP forwarding before registering. tailscale up prints a warning
about this (“IP forwarding is disabled, subnet routing/exit nodes will not work”). It does not block
on it. Skip this step and you end up with a route that’s approved but never forwards traffic.
The script mints a preauth key on the Headplane server and uses it to register the router, advertising the tier’s CIDR as a route.
Approving an advertised route on the Headscale side is not automatic, so the script does this for
you: it looks up the router’s node ID and approves the tier CIDR against it. Without that approval,
list-routes shows the route as Available but never Approved or Serving. It can take a
few seconds for Serving (Primary) to catch up even after approval. That’s normal.
You can also see this from the Headplane UI: the router shows Connected with a Subnets badge once it’s advertising the route.
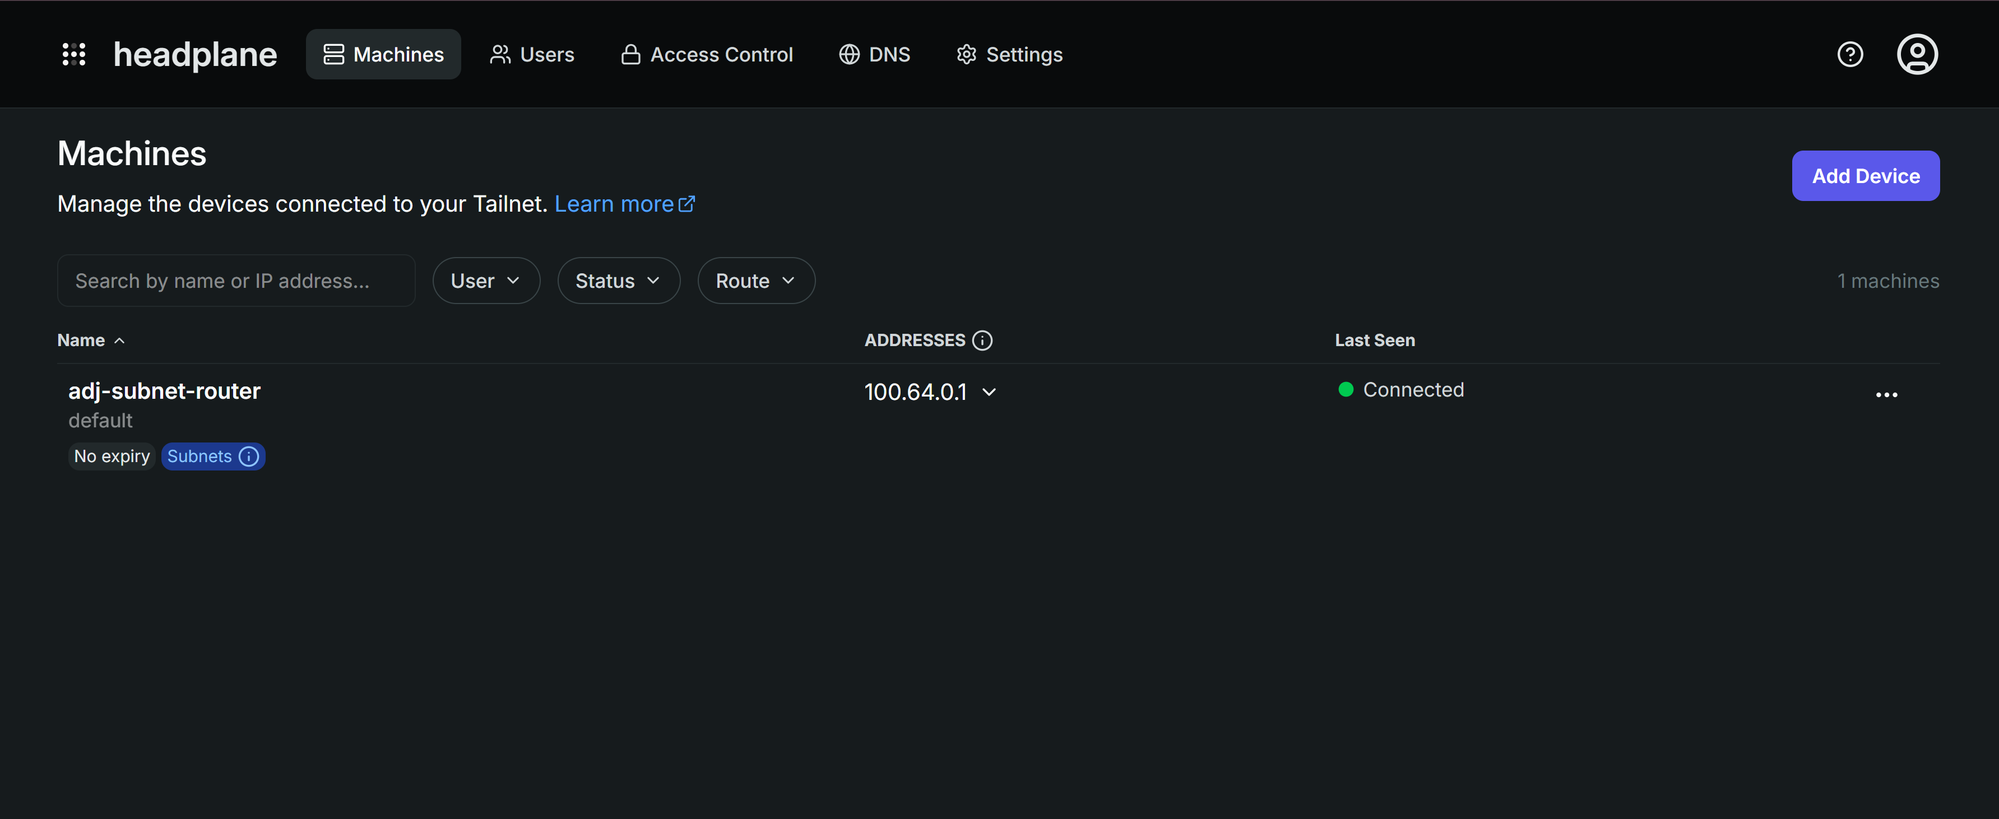
This VM is the door into the private tier. Later tutorials’ desktops and storage sit behind it without needing their own public IPs.
Inspect what was created
Section titled “Inspect what was created”Everything the script built is a normal ZCP resource. List it the same way you’d list anything else:
zcp vpc listzcp network listzcp instance listzcp acl rules my-workspace my-workspace-aclID NAME STATE PRIVATE IP PUBLIC IP REGIONa1b2c3d4-... my-workspace-headscale Running 10.0.0.214 198.51.100.10 YUL-1e5f6a7b8-... my-workspace-subnet-router Running 10.0.0.76 198.51.100.11 YUL-1acl rules takes the VPC’s slug, not its name. They’re the same on a clean account, but a name can
get an auto-suffixed slug (my-workspace-1) if something else already used it. If the command above
doesn’t resolve, get the real slug from zcp vpc list first.
Connect from your own machine
Section titled “Connect from your own machine”The build script’s own final summary already mints a fresh preauth key for your device. It prints a
ready one-liner that installs Tailscale, if it isn’t already installed, and registers it against
your Headscale server in one step. This is the same vpn/install.sh script you’d use to onboard any
other endpoint. Copy that line from your terminal output. It looks like this (key genericized, yours
is a real value):
HEADSCALE_URL="http://198.51.100.10:8080" \ bash <(curl -fsSL https://raw.githubusercontent.com/zsoftly/tools/main/vpn/install.sh) "your-name" --key "hskey-auth-EXAMPLE..."Paste it into a terminal on your own machine and run it. On macOS you may need to approve a network
extension once in System Settings → Privacy & Security before it finishes connecting. On Windows
without WSL or Git Bash, use vpn/install.ps1 from the same zsoftly/tools repository instead. The
PowerShell invocation pattern is in that repo’s README.
Verify:
tailscale statusping <router-tier-ip>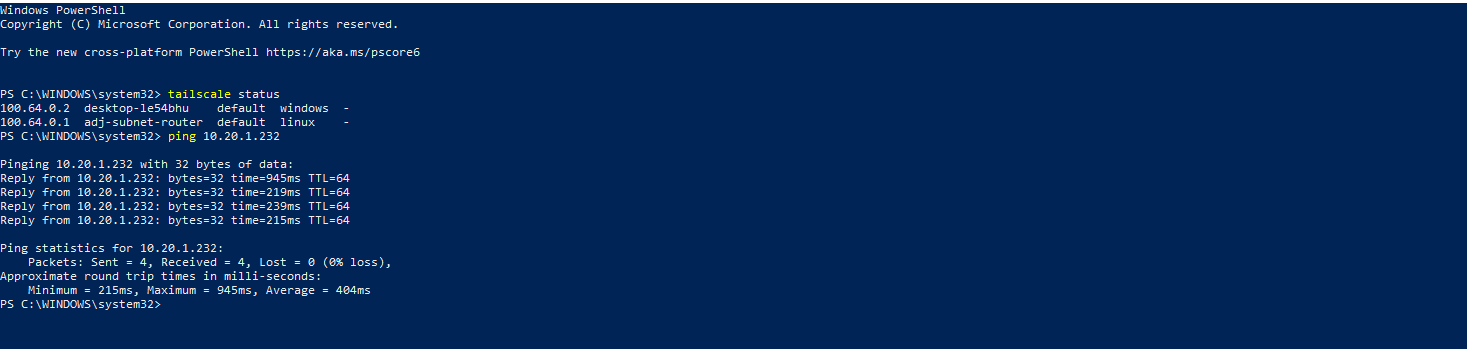
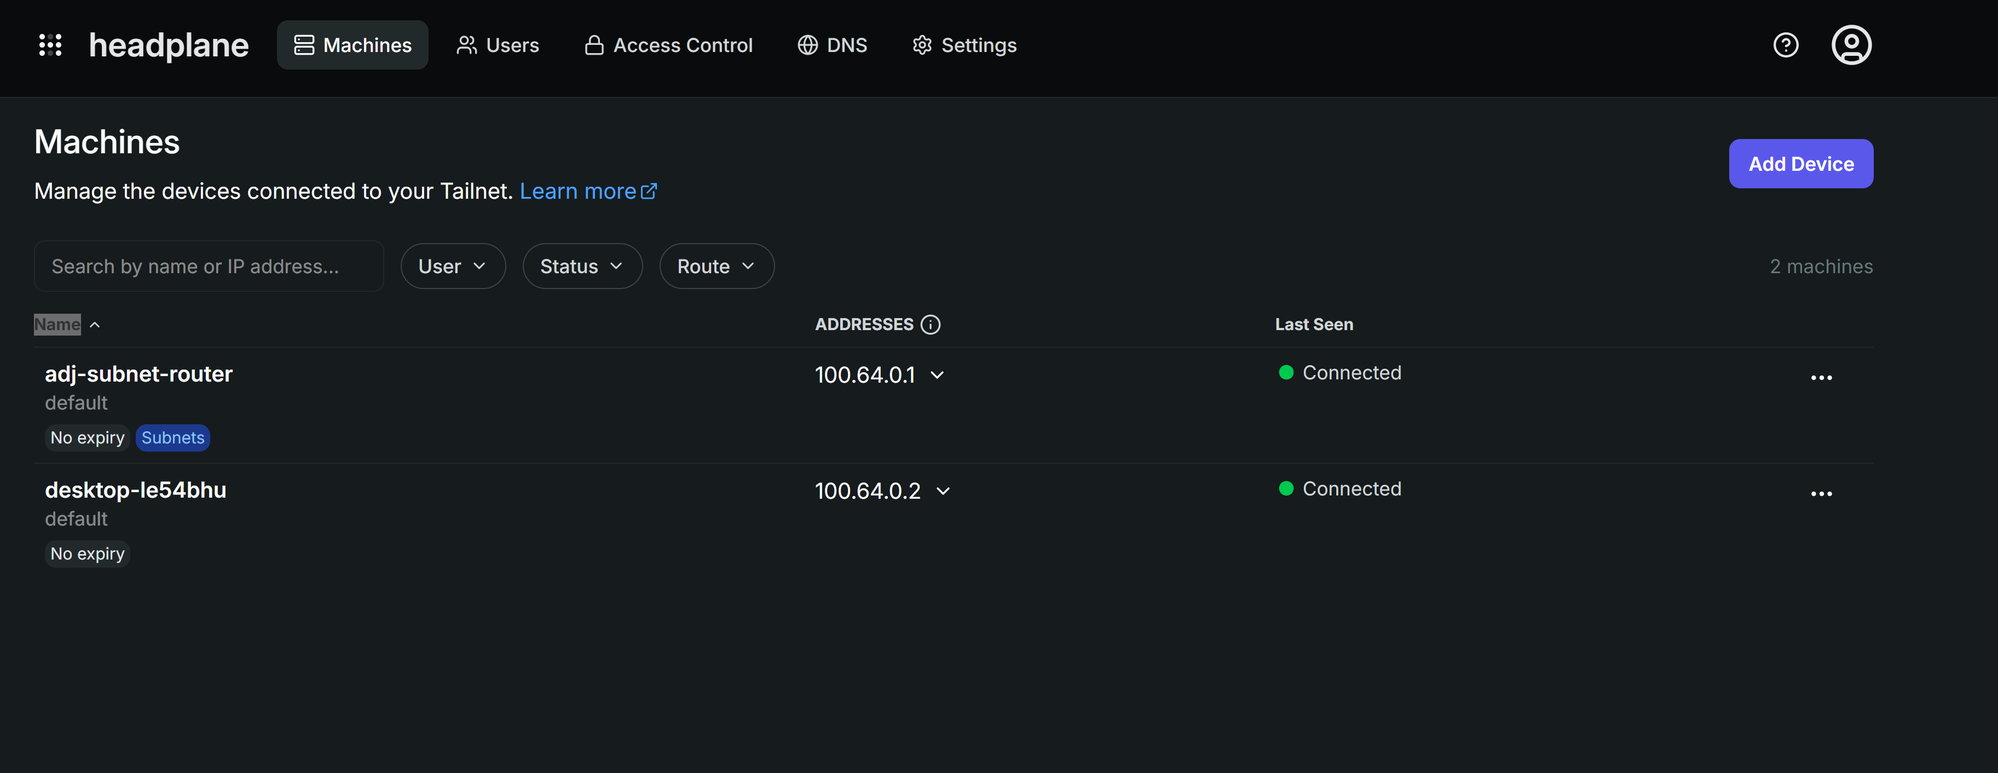
Direct, same-region connections typically respond in a few milliseconds. A connection relayed through a DERP server (common across distant networks) can take several hundred milliseconds, especially on the first packet while the path negotiates. Both are normal. Network path affects latency far more than VM size does.
Verify isolation
Section titled “Verify isolation”Reaching the subnet router’s own tier IP in the previous section proves the router itself has no public exposure. It does not prove the tier as a whole is isolated. That traffic terminates directly at the router’s WireGuard endpoint. Reaching any other VM on the tier goes through the router’s forwarding instead, a different path.
For real proof, deploy a second VM the same way the script deployed the subnet router: its own public IP for setup, then attached to the tier. That public IP is only there so you can configure it, not part of what’s being tested:
zcp instance create --name isolation-check \  --template ubuntu-2404-lts-1 --plan ci2ls --billing-cycle hourly \  --network-plan pnet-yul --storage-category pro-nvme --ssh-key my-key --wait
zcp instance add-network isolation-check --network my-workspace-tier
add-network also takes the tier’s slug, not its name, the same caveat as above. Get it from
zcp network list if the name alone doesn’t resolve.
SSH in over its own public IP and bring up the hot-added tier NIC the same way the script did for the router (see “The subnet router” above for why this manual step is needed):
ip -br link show   # find the new interface, typically ens8
sudo tee /etc/netplan/60-tier-nic.yaml <<'EOF'network:  version: 2  ethernets:    ens8:      dhcp4: trueEOFsudo netplan apply
ip -4 -br addr show ens8   # note the address it gets, e.g. 10.20.1.201
From your already-connected device:
ping <isolation-check-tier-ip>That succeeds, through the mesh and the router’s forwarding, not just to the router’s own address. Now try reaching the same tier IP from anywhere that never joined the mesh: your own home network, a different machine, anywhere on the public internet. It fails, every time. That address is private, with no public IP and no port-forward rule anywhere in this design. It was never internet-reachable in the first place, mesh or no mesh. That is the actual proof of isolation, not the mesh itself.
Like every --network-plan deploy in this tutorial, isolation-check also created its own
standalone network and pinned source-NAT IP. instance delete won’t remove it, and the teardown
script only manages resources under --name my-workspace, so it won’t touch this one either.
Capture that network’s ID before deleting the VM, since the association disappears once the VM
is gone:
zcp ip list -o json | jq -r '.[] | select(.vm=="isolation-check") | .network_id // empty' | head -1Then delete the VM (zcp instance delete isolation-check). It’s not part of the working setup, just
a way to see this for yourself. Find the network that ID belongs to and remove it from the CMP web
portal, the same way described in the Clean up caution below.
Clean up
Section titled “Clean up”Hourly billing runs while resources exist. The teardown script removes the subnet router, the
Headplane VM, the private tier, and the VPC, for a given --name prefix.
bash <(curl -fsSL https://raw.githubusercontent.com/zsoftly/tools/main/zcp/destroy-private-network.sh) \ --name my-workspaceIt picks up ZCP_REGION/ZCP_PROJECT from your shell the same way the build script does. Pass
--region/--project instead if you didn’t export them.
- Install the CLI, authenticate, find your account’s resource slugs, and import an SSH key (Steps 1-4).
- Run
build-private-network.sh --ssh-key <name> --name my-workspace. It creates the VPC, private tier, locked-down ACL, Headplane, and subnet router, then prints a connect command for your own device. - Copy that command from the script’s output, run it on your own machine, then verify with
tailscale statusand a ping into the tier. - Run
destroy-private-network.sh --name <prefix>when you’re done, to remove everything and stop billing.
Next steps
Section titled “Next steps”The next parts of this series (private shared storage, then Ubuntu employee desktops, both reusing the tier and mesh you built) are still in progress. In the meantime:
- CLI reference: every command and flag
- Tutorials overview: the full list of available tutorials